Wednesday, November 6, 2024
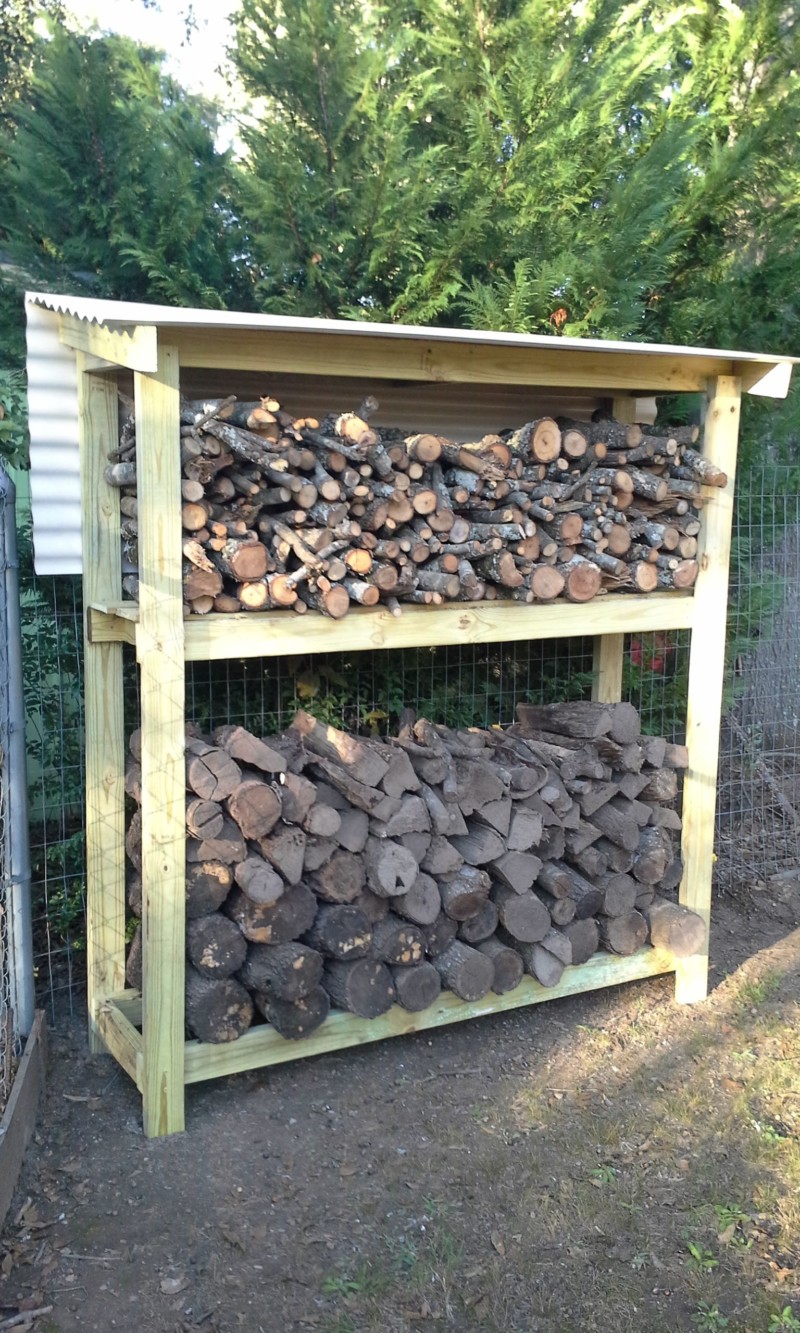
How to build a simple and efficient firewood storage shed

Alright, let's talk firewood sheds. You've got your trusty axe, a pile of logs ready to go, and you're thinking, "Time to build a proper home for this wood!" I'm with you. A good firewood shed is a game-changer, keeping your wood dry, organized, and ready for those chilly nights.
Let's Break It Down
First things first, let's decide what kind of shed we're building. We're going for simple and efficient, right? That means keeping things practical and avoiding anything too fancy. We're talking about a basic structure that gets the job done.
The Design: Simple is Best
Think of a rectangular shape, like a mini barn. We'll have a roof to protect the wood from rain and snow, and walls to keep it contained. No need for fancy gables or fancy windows â€" just a sturdy shelter.
The Materials: Keeping it Affordable
You don't need to break the bank on this project. Here's a good starting point:
Foundation: Concrete blocks are a solid choice. They're affordable, easy to work with, and provide a stable base.
Frame: We're going with pressure-treated lumber for the frame. It's resistant to rot and moisture, which is crucial for a firewood shed.
Roof: A simple gable roof is perfect. You can use plywood for the roof sheathing, and asphalt shingles for the roofing material. They're budget-friendly and do the job well.
Walls: We'll use plywood for the walls. It's strong, affordable, and easy to work with.
Doors: You can use pre-made doors for the entrance.
Let's Build It!
Alright, time to roll up our sleeves and get building!
1. Foundation: Start by leveling the ground where you want to build your shed. We'll be using concrete blocks, so dig out a shallow trench for them to sit in. Lay the blocks in a row, making sure they're level. You'll probably want to use a level and a rubber mallet to make sure they're perfectly aligned. You can even use landscape fabric beneath the blocks to help with drainage.
2. Frame: Now, let's build the frame. Cut the pressure-treated lumber to the desired size of your shed. Using corner brackets, attach the posts together to form a rectangle. Make sure to use screws and drill pilot holes to avoid splitting the wood.
3. Roof: We're going with a simple gable roof. Cut the rafters to the desired length and attach them to the top of the frame, creating a triangular shape. Use a level to ensure the roof is angled correctly. You'll probably want to use some temporary supports to keep the rafters in place while you attach the roof sheathing.
4. Walls: Now it's time to add the walls. Cut the plywood sheets to fit the dimensions of the shed. Attach the plywood to the frame using screws, making sure they are screwed into the studs for support. You can use construction adhesive to help create a watertight seal.
5. Roof Sheathing: Cut and attach plywood to the rafters, creating a flat surface for the shingles. Secure the sheathing using screws.
6. Roofing: Now it's time to lay down the shingles. Start at the bottom and work your way up, overlapping each layer. Make sure you use a shingle hammer and nails specifically designed for roofing.
7. Doors: Install the doors. You can use pre-made doors or build your own. Make sure the doors are properly secured to the frame, using hinges and latches.
8. Finishing Touches: Once your shed is built, you might want to consider adding some finishing touches. You can paint the shed to protect the wood and give it a personalized look. You might also want to consider adding a shelf or two for storing kindling or tools.
Tips for Success:
Plan It Out: Before you start building, sketch out a simple plan. This will help you visualize the shed and ensure you have the right materials.
Measure Twice, Cut Once: Take your time and double-check your measurements before making any cuts.
Use Quality Materials: Don't skimp on materials, especially the lumber.
Work Safely: Always wear safety glasses and gloves when working with power tools.
Take Your Time: Building a shed is a rewarding project. Take your time and enjoy the process.
Beyond the Basics
If you're feeling adventurous, you can add a few extra features to your shed:
Ventilation: Adding vents to the roof or walls can help circulate air and prevent moisture buildup.
Shelving: Build shelves inside the shed to organize your wood and store tools.
Floor: You can add a concrete floor to the shed for extra durability.
The Final Touch
Once your shed is built, you can start stocking it with wood! Remember to arrange the logs to allow for airflow and prevent mold growth. You can also add a tarp over the top of the wood for extra protection.
Building a firewood shed is a great way to enhance your outdoor space. It's a project that can be done on a weekend, and it's a project that will pay off for years to come. Now get out there and build that shed!
No comments:
Post a Comment
Note: Only a member of this blog may post a comment.